Blog

Why Are IPAs So Popular?

It seems that not matter which bar, and indeed which type of bar (craft, sports, traditional pub, etc.) you visit these days, one thing is a certainty, and that is the presence of at least one IPA on tap at the bar. They may have even given your favorite beer the boot from the tap…

Beer Cheese Soup – A Delicious, Easy-to-Make Classic

I feel very fortunate to live where I do in Tampa, FL, as there is a legendary German restaurant not even 5 minutes from my house; Mr. Dunderbak’s. Mr. Dunderbak’s is the place where I first dipped my toes into the waters of craft beer, and is where some of my fondest beer drinking memories…

So You Want To Brew Your Own Beer – Step 5: Bottling Day

Now that your beer has been brewed, and has been through its primary and secondary fermentation phase, it’s time that we finally get that beer into bottles so that you can enjoy your very first batch. As with all steps in the brewing process, we will begin by sanitizing all of the equipment that is…

So You Want To Brew Your Own Beer – Step 4: Secondary Fermentation

Now that brew day is complete, and your wort has been fermenting, and has turned into beer. You’ve been watching your airlock, and it has slowed down to a very intermittent and less vigorous bubbling. Once the airlock has finished bubbling completely, wait 24 more hours, and at this point, you are now ready to…

So You Want to Brew Your Own Beer – Step 3: Brew Day

Now that we have secured our equipment, and we have our ingredients, we’re going to focus on the best part – brew day! There’s nothing quite as exciting as brewing your first batch of beer, and it can seem a little intimidating, but if you read all of the instructions in advance and follow them…

So You Want To Brew Your Own Beer: Step 2 – The Ingredients

Now that you know what equipment you need in order to brew great beer at home, we’ll be taking a look at what ingredients are required. At its most basic, beer is comprised of 4 ingredients; water, malted barley, hops, & yeast. As I am focusing on first-time homebrewers, and as I suggested in part…

So You Want To Brew Your Own Beer – Step 1: The Basic Equipment

You’ve explored the vast array of beer styles from light, crisp lagers, to black-as-death imperial stouts, and everything in-between. You can blindly identify a kettle sour from a gose, and a Märzen from a Helles. You’ve visited all of your local craft brewers on many occasions, and your favorite craft beer bar knows your order…

Beer 101 – Beer Basics: What Is Beer?

In this ongoing blog series we’ll be exploring beer from A to Z, and hopefully demystify the wonderful, varied world of beer. If you enjoy beer and have always wondered how it’s made, what’s in it, how does it get from grain-to-glass, or any other facet of beer making and its constituent parts, then this…

The Top 10 Best Craft Brewers in Tampa, FL

As a craft beer lover located in Tampa, FL, I am blessed to be spoiled for choice when it come to craft beer options. Indeed, some of the top-rated craft brewers in the country call Tampa, FL home. Whether you’re a local who is looking to find a new local craft brewer, or a tourist…

What’s So Special About Craft Beer?

With so many beer buying options in the marketplace, and prices varying wildly from one beer to the next, why would somebody pay a premium to drink the favorite beverage of hipsters the world over? While this may seem like a silly question to those of us who are absolute craft beer fans, to the…

Loading…

Something went wrong. Please refresh the page and/or try again.


Follow My Blog

Get new content delivered directly to your inbox.

The Craft Beer Corner

Latest from the Blog

Beef And Ale Stew – A Journey of Cooking With Beer

I recently treated myself to one of the most indispensable kitchen items that is, in my opinion, a must-have for any home cook; a large Dutch oven. Now, I’ve had a solid cast iron Dutch oven for a while that I use for homemade sourdough bread, but that one was quite a bit too small,…

Get new content delivered directly to your inbox.

The Craft Beer Corner

About

I am a dedicated craft beer enthusiast who loves trying new craft beers, homebrewing, beer blogging, beer vlogging, cooking with beer, and learning about new and exciting craft beers and breweries.

Contact

Don’t hesitate to reach out with the contact information below, or send a message using the form.

Send Us a Message

Why Are IPAs So Popular?

It seems that not matter which bar, and indeed which type of bar (craft, sports, traditional pub, etc.) you visit these days, one thing is a certainty, and that is the presence of at least one IPA on tap at the bar. They may have even given your favorite beer the boot from the tap in order to make space for more popular beers. This begs the question – why are IPAs so popular? Why does it seem that no matter where you go, IPAs are everywhere? How did this beer style become the reigning popularity king of the tap list? To answer those questions, we’ll have to take a little trip back in time and first visit where we came from in order to piece together how we got to the present beer reality.

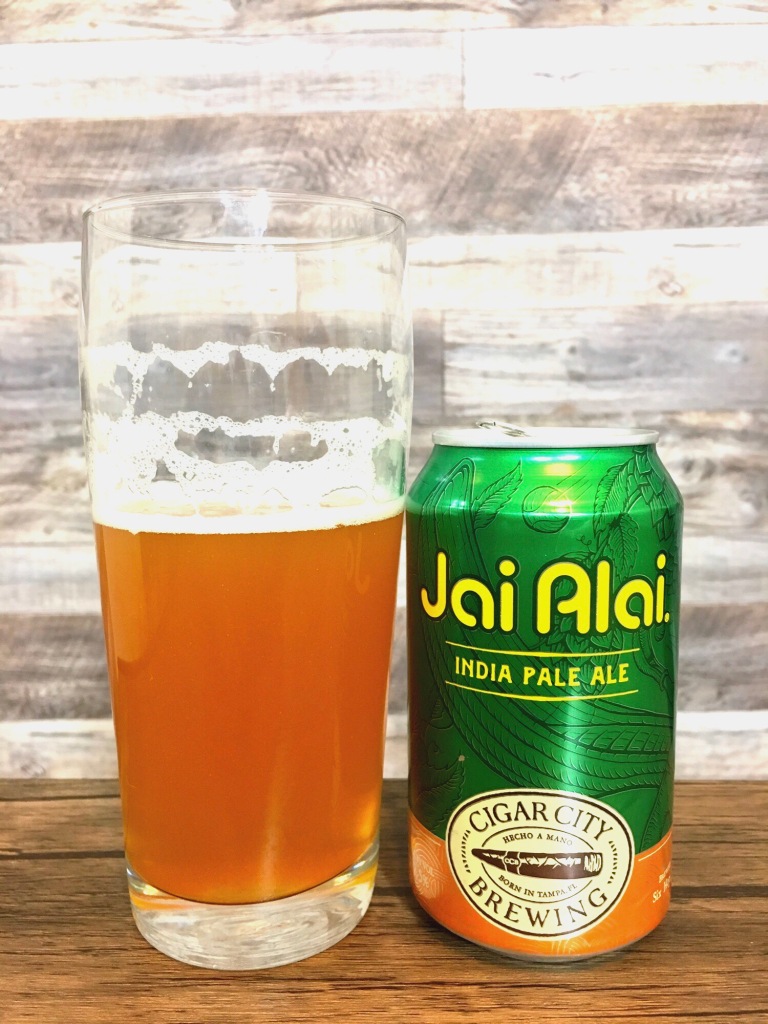
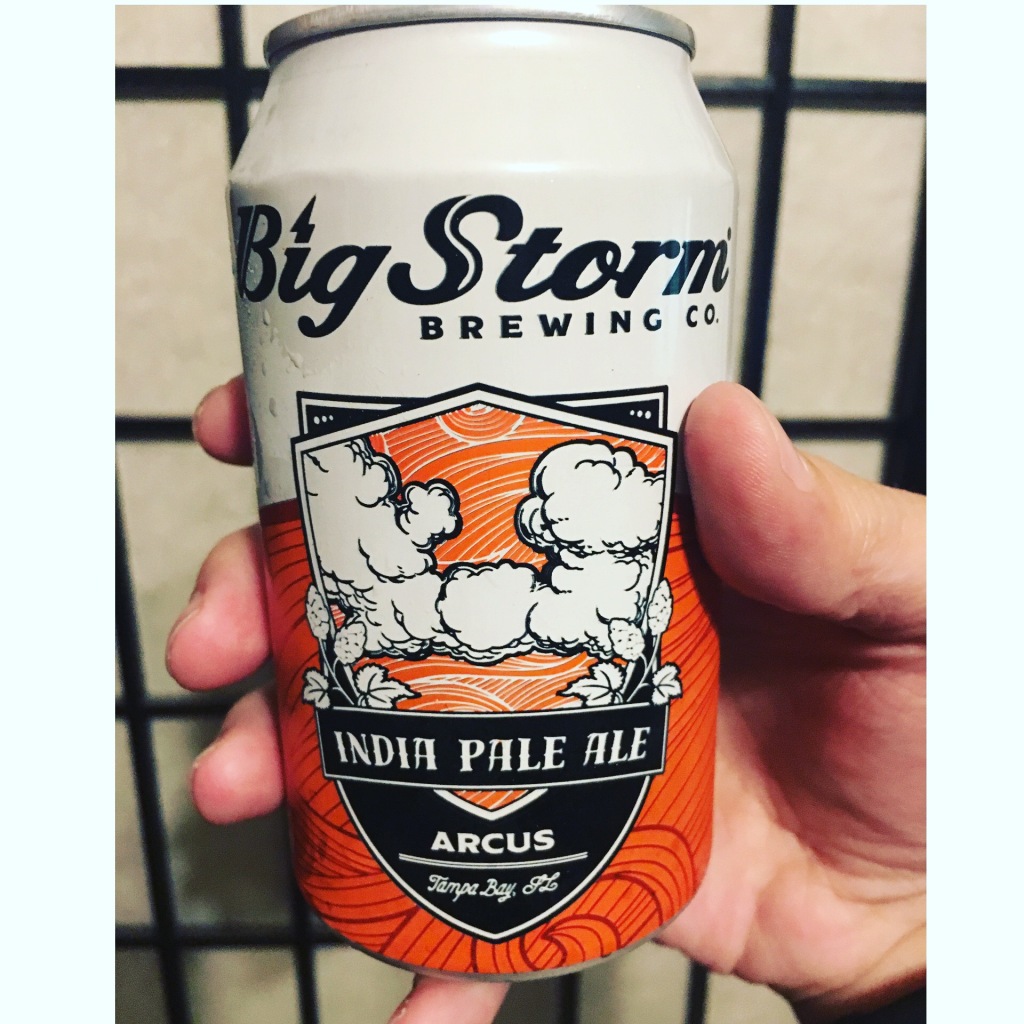
First things first, before we dive into the past, let’s make clear what an IPA is for the uninitiated. IPA (India Pale Ale) is, as the name implies, an ale that is in the lighter color spectrum of beers styles. Though as with any beer style, there are variances in color, and IPAs are no exception. They are most often a bright yellow color, but can also look more amber or caramel color in hue as well. This is especially true for imperial variants. There are also rogue IPAs out there, such as Cascadian dark ales or black IPAs, which are as dark in color as a standard stout, but for now we’ll focus on the classic, original IPA. So we’ve established that IPAs are lightly colored ales, but what about the India part? While there is still debate as to the true etymology of “India” in the beer’s name, the commonly accepted history is that it came about from the 1800s when Britain was setting up shop in India and opening trade routes. As the voyage was long, and refrigeration didn’t exist yet, beer would often spoil or become infected during the months long journey to India. The East India Company tried to find a beer that would survive the journey, and as they were based in London, had plenty of brewers from which to choose.

One brewer nearby, Bow Brewery, was well-known for brewing porters and other dark beers, which were very popular, and the East India Company decided to approach their brewer, George Hodgson, to brew beer for the ship’s captains, and other Englishmen upon arrival in India. Porter, at the time, was considered to be a commoner’s beer style, so they asked Hodgson to brew October beer for their journeys. October beer was made from lighter, newer malt, and was only kilned lightly, so that it had a much cleaner, and lighter color & taste. Hodgson also added a LOT more fresh hops to the beer in order to keep it tasting fresher longer. During the course of the 6 month journey to India, this October beer matured multiple times due to the intense heat, and constant agitation in the barrels (due to being aboard a ship at sea). This over-maturation of the beer caused it to ultimately change into a completely different beer from what was originally brewed, and this became known as pale ale. The larger additions of hops not only kept the beer tasting fresher, longer, but hops also have antiseptic properties, so the larger addition of hops further extended the shelf life of the product. The beer proved to be a massive success, and while it initially had a very long name, it was shortened to simply India Pale Ale sometime between 1835 – 1840.

Fast forward and move over to America, and during the 1800s and early 1900s, beer was indeed big business. There were many immigrants who came to America with their traditional brewing methods, and started brewing beer for the masses. There were hundreds and hundreds of brewers eagerly satisfying America’s thirst for quality beer. Most of the large beer producers in America were established during this time period, and the beers produced back then were vastly different from what is brewed today by those same brewers. After the repeal of the 18th Amendment (alcohol prohibition), beer production did slowly resume, but during the war era, ingredients were rationed, as soldiers needed those ingredients for their food supply, which in-turn led to beer producers using adjunct ingredients (corn, rice, etc.) in their beer. The end result was that while we had beer back, it was nothing like what was brewed just a few decades before, and American’s had grown so accustomed to it, that it became the norm.

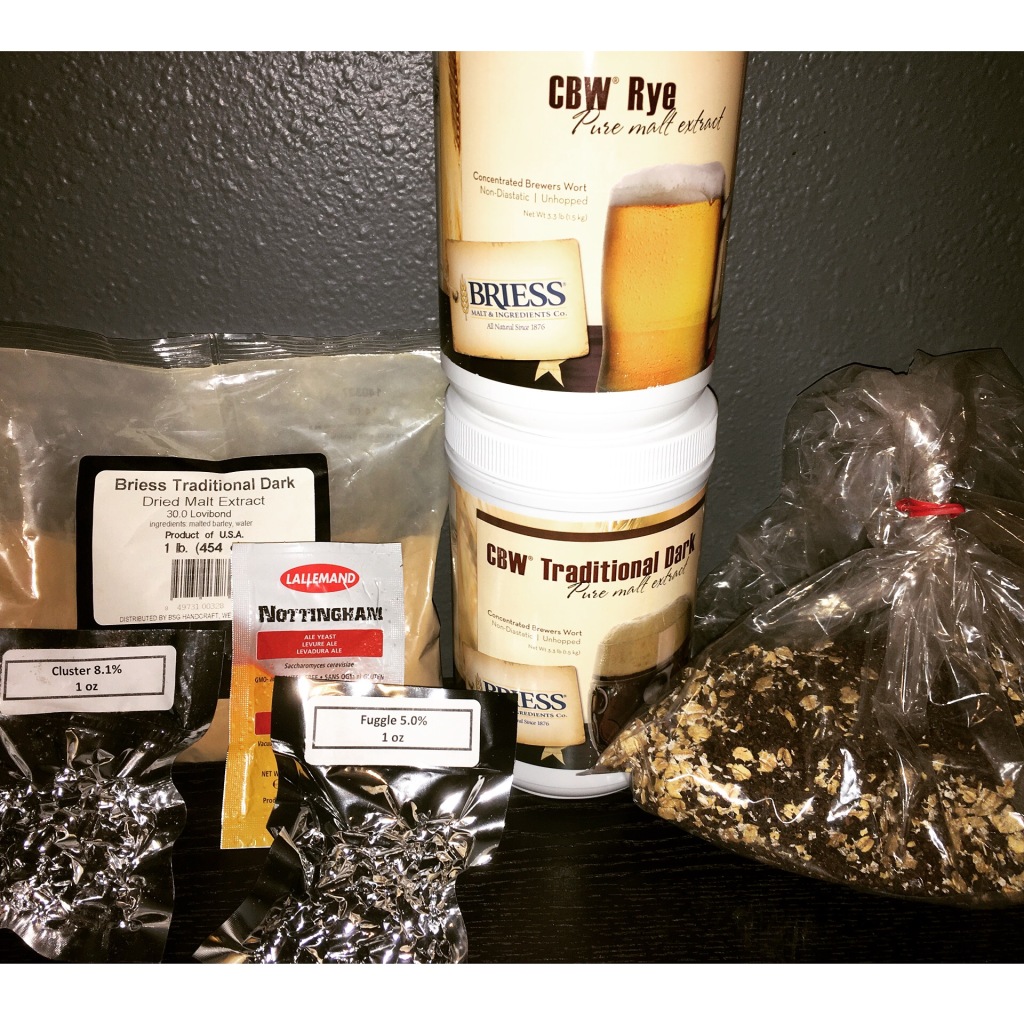
Fast forward to the 1970s, and Jack McAuliffe, who was a homebrewer, founded the first microbrewery since the Prohibition era (New Albion Brewing Co.), in California. McAuliffe produced beers that were nothing like the current, pale, flavorless beers that were available, and re-introduced quality beer back to the country. His business wasn’t around long, but long enough to have an impact. In 1978, a bill was singed into law that allowed people to brew a small amount of wine or beer for personal consumption. This opened the path for people to get back to basics, and brew with traditional ingredients in traditional styles, and have completely different beers to enjoy. Out of this newfound ability to brew great beer at home, some of those plucky homebrewers decided that if they liked the beer they were brewing, so too might others, and the first brewpubs began to emerge in America. This was the beginning of the craft beer movement, and helped to launch the beer scene from just 42 brewers in 1978, to the several thousand we have today.

The reemergence of quality beer started in CA, CA and has been a hotbed of craft beer innovation ever since. Brewers like Sierra Nevada, Anchor, and Stone Brewing (as well as Sam Adams on the E. coast) started experimenting with styles, and brewing beer we haven’t seen in the country ever before. Along with brewing new styles, we also revisited classic styles such as IPAs. As more craft brewers came on to the scene, so too did more competition, and brewers started getting more and more innovative with the beer, and pushing the envelope further and further. IPAs (as well as other beer styles) turned into imperial IPAs. Those in-turn started being brewed with new, experimental hops. The hop race was on, and IPAs got hoppier and hoppier, and eventually spawned a new sub-style, the W. Coast IPA (which is well-known as being the most hop-forward of all IPA sub-styles).

As more-and-more people had access to more beer from craft brewers, more people had exposure to beer that wasn’t the same old, big box, pale, lackluster beer that we’d been drinking for the better part of a century. People were once again acquainted with beer that was brewed with quality ingredients, and with many, many different styles from which to choose. What started as one small microbrewery snowballed into the craft beer movement we have today. People craved beer with flavor, and wanted to be able to choose more than one beer style to enjoy. People were experimenting with new beer styles, and discovering how unique and vast the landscape is in the world of beer. Quality beer was here to stay, and since then, it’s only continued its exponential growth.

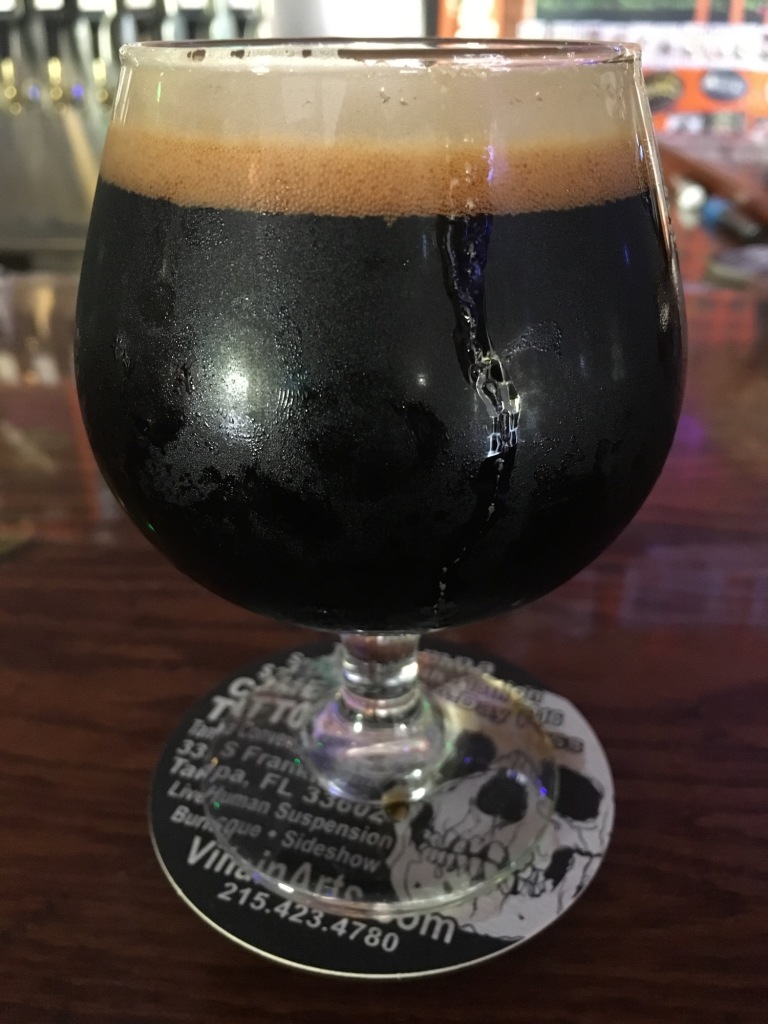
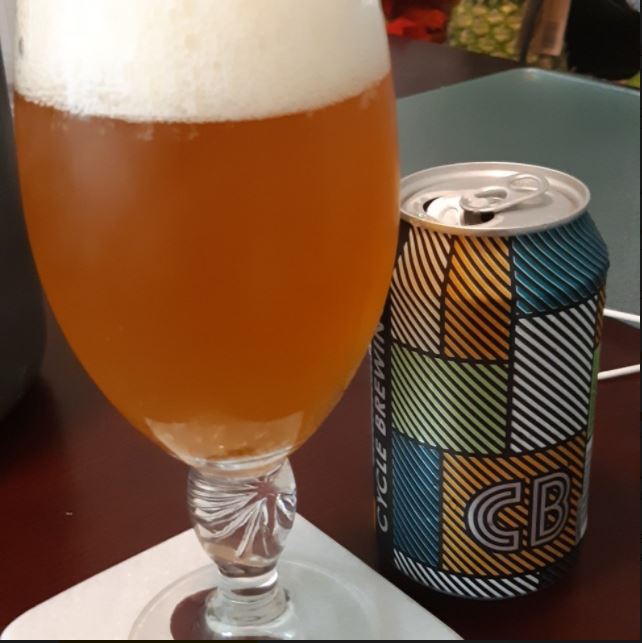
Now that we’ve arrived at present day, let’s get back to our original question – why is IPA so popular? IPAs have spawned into many, many different sub-styles, and have something to offer any beer lover’s palette. New England IPAs accentuate the fruit and floral characteristics of hops. Milkshake IPAs add lactose to cut-out the intensity of the bitters inherent in today’s hop varieties. Cascadian dark ales let those who crave richly roasted malts also have a nice boot full of hops and bitters in their beers. Classic W. Coast IPAs have the resinous, bitter intensity that hop heads crave. The short answer to the question is that IPAs are an extremely varied beer style, and have unique attributes that let them appeal to a large variety of tastes. Whether you like intensely bitter beers, rich and malty beers, high ABV beers, low ABV beers, fruity beers, sweet beers, or virtually anything in-between, IPAs have you covered. IPAs are, by a vast margin, the most popular beer style in America. You see IPAs everywhere because they are everywhere. IPAs aren’t going anywhere anytime soon, and as long as craft brewers keep coming up with new, inventive sub-styles, I expect that IPA will continue to take up precious tap real estate at your local bar. From this hop head’s perspective, it’s a wonderful thing.

Beer Cheese Soup – A Delicious, Easy-to-Make Classic

I feel very fortunate to live where I do in Tampa, FL, as there is a legendary German restaurant not even 5 minutes from my house; Mr. Dunderbak’s. Mr. Dunderbak’s is the place where I first dipped my toes into the waters of craft beer, and is where some of my fondest beer drinking memories were made with friends going back 20 years. It’s the first place I ever had proper German beer, it’s where I had my first porter, IPA, Eisbock, Doppelbock, Hefeweizen, Maibock, and many, many other styles. This place has over 50 beers on tap, and another couple hundred in their beer cooler, and then another 500 – 1,000 in their beer cellar. It is fair to say that this place is beer Nirvana if you’re in Tampa.

Aside from the unbelievable array of top-tier beers they have in-house (including their own creations), Mr. Dunderbak’s also has an equally epic menu that has some of the best German food I’ve ever eaten in my life. Their schnitzels are bigger than your head, and their Kartoffelpuffern (potato pancakes) are beyond a doubt the best you’ll ever eat. Aside from classic German fare, they also have their own home-made beer cheese soup, and yet again, Mr. Dunderbak’s is the first place I ever had it, and boy did it change my world.

Beer cheese soup is rustic, and simple, but packed with flavor, and is easy to make as well. There are plenty of methods one can use, and the the customization is effectively endless. It’s a wonderful canvas upon which to put your personal preferences into a dish. It doesn’t take too much time to make, the ingredients list is fairly short and inexpensive (most of which you likely already have in your pantry), and it yields a very large amount of soup for your effort, so you can feed the family multiple meals from one batch. It can just as easily be made vegetarian friendly (not vegan) or can be made into a meat lover’s dream. The limitations are really up to the limits of your own creativity.

As you can see from the picture above, I baked some homemade sourdough bread bowls for my latest batch of soup, but you can just as easily serve this up in a bowl by itself, or buy some bread bowls from your local bakery if you’re not into baking your own bread. I’m a fan of meat in soups, so I did add some bacon and chicken to my most recent batch, but again, you can add whatever additional ingredients you want to make it your own. At its core, it’s a stock – vegetable, chicken, or pork (you could use beef, but the richness might overwhelm the dish) with your favorite cheeses incorporated into it, some basic seasonings and vegetables, butter, flour, cream, and your favorite beer. It really is easy to make and light on the wallet.

I would suggest that not using a very dark beer would be ideal, again, just to balance out the flavors in the dish. You could use a pale ale, adjunct lager, amber ale, pilsner, whatever suits your fancy. I tend to pick a beer that has a relatively strong flavor profile over something really light. In my latest batch I used Sierra Nevada Pale Ale, and it worked beautifully with the other ingredients in the soup. For cheeses, just as with the beer selection, you can use anything you like, but I like a bold cheese in this soup, and I used a blend of sharp cheddar, swiss, and pepperjack. Keeping with the bold trend, I also added some jalapeños for extra flavor and a bit of heat. However you choose to make this soup your own, it’s going to be tasty, so have fun with it, and enjoy.

Ingredients:

1 finely-chopped, medium-sized onion (or a few shallots)

2 or 3 jalapeño peppers (optional)

4 -5 large cloves of garlic (minced)

10 TBSP butter (salted or unsalted is fine)

1/2 cup + 2 TBSP all-purpose flour

10 cups of stock (vegetable, chicken, or pork)

1 cup cream (normal or heavy is fine)

1 lb. shredded cheese (whatever kind you like)

1 TBSP freshly chopped thyme (or 1/2 TBSP dry thyme)

Salt (to taste)

1 TBSP black pepper

1/2 tsp smoked paprika

Parsley (fresh, chopped or dried) – for garnish (optional)

8 oz. of bacon chopped (can be skipped for vegetarian version)

1 lb. chicken thighs chopped (can be skipped for vegetarian version) – I used boneless/skinless thighs

1/2 tsp ground mustard seed

2 pints beer (or 2 1/2 12 oz cans/bottles if you don’t have pints)

Instructions:

  1. In a large pot, cook bacon over medium heat until crispy, then remove bacon from pot, leaving bacon grease behind.
  2. Add garlic, onion, jalapeños, black pepper, smoked paprika, and ground mustard seed (and thyme if fresh – if dried, do not add) to bacon grease and cook until tender/translucent. – If you’re making a vegetarian version, add 2 – 3 TBSP oil to pot over medium heat to cook the garlic, onion, jalapeños, black pepper, smoked paprika, ground mustard seed, & thyme (again if dried thyme, don’t add). If you use olive oil reduce heat to med-low.
  3. Add 1/2 of the beer, and cook until volume is reduced by roughly half.
  4. Add stock to pot, and bring to a simmer (you can increase temperature to medium-high to get simmering quicker, but reduce temperature again so that it’s a gentle simmer and not a rolling boil).
  5. While stock is heating to a simmer, in a separate saucepan, melt butter (medium-low heat) and add flour to make a roux. Cook while stirring constantly until lightly golden in color.
  6. Remove roux from heat, and stir into the simmering stock until fully incorporated (a large whisk works well here).
  7. Continue to stir occasionally until soup thickens (ca. 10 minutes).
  8. Add cream, cheese, and remaining beer to pot, stirring occasionally until back to a simmer.
  9. Continue to let soup simmer for 10 minutes (stirring occasionally).
  10. Remove soup from heat, and stir in bacon & chicken (or whatever meats you have if you’re adding them).
  11. Add salt to taste (optional)
  12. Soup will continue to thicken as it stands.
  13. Garnish plated dish with parsley (optional)

So You Want To Brew Your Own Beer – Step 5: Bottling Day

Now that your beer has been brewed, and has been through its primary and secondary fermentation phase, it’s time that we finally get that beer into bottles so that you can enjoy your very first batch. As with all steps in the brewing process, we will begin by sanitizing all of the equipment that is going to be touching our beer. The equipment that is needed on bottling day, and that must be sanitized is as follows: beer bottles, bottle caps, tubing, auto-siphon, primary fermenter/bottling bucket, (we’ll expand on this), bucket lid, bottle drying rack (if you have one – I highly recommend getting one, as it make bottling day much simpler), beer spoon, hydrometer, and bottle filler. This is also the step in the process where the priming sugar comes into play, so we will be preparing that mixture while our sanitized equipment is drying.

Once all equipment is thoroughly sanitized, we’re going to prepare the priming sugar solution. Priming sugar is used to carbonate the bottled beer, as the yeast has already consumed all of the sugars in the beer and converted them to alcohol, so we need to add additional sugars back into the beer in order to wake-up the yeast in the beer and provide them with a food source to create the desired carbonation in our bottles. Most often, you will find priming sugar in 5 oz. bags, however, for a standard 5 gallon batch of beer, you do not want to use the entire bag. I recommend using between 4 and 4.5 oz. of the priming sugar, and saving the remainder for a future batch that you brew. 5 oz. tends to be too much, and will over-carbonate your beer, and make a huge mess when you crack one open, as well as waste beer that you worked so hard to make. If you want to play it safe, keep it in the 4-4.5 oz. range, or split the difference and go with 4.25 oz.

Yet again, we are not going to use tap water, so make sure to use fresh, bottled watered to mix the priming sugar solution together. To make the solution, all you need is 4 – 4.5 oz. of the priming sugar added to 2 cups of boiling water. Make sure to stir the mixture constantly while it is boiling for 5 minutes. Once the 5 minutes have elapsed, your solution is ready to be added to the beer. We’ll let the solution sit and cool down while we transfer our beer from the secondary fermenter (usually a carboy) and into our bottling bucket. The bottling bucket is usually a dual-purpose vessel, as it’s also your primary fermenting bucket. The bottling bucket is purpose-built with a spigot at the bottom, which is where we will connect the tubing and bottle filler to actually get the beer into the bottles. As with all transfers from vessel-to-vessel, we want to put the auto-siphon down into the beer, and the end of the tubing down into the bottom of the new vessel (bottling bucket). There may still be very small amounts of sediment in the carboy at this stage, so make sure to keep the auto-siphon above the line where there is any obvious sediment. Before activating the siphon, make 1 more check that the spigot on your bottling bucket is closed, lest any of your beer start to dump onto the floor. With everything doublechecked, you can start the transfer from the carboy to the bottling bucket. I recommend having the carboy above the bucket (on a table, sturdy chair, etc.) and the bucket on the floor so gravity will help with the speed of the transfer.

After the beer has been transferred to the bottling bucket, you are now ready to mix in the priming sugar solution into your beer. Before adding the priming sugar solution, take 1 final gravity reading. This final reading is your true final gravity, so grab your notes, and calculate your final ABV. Now, pour the solution into the beer in your bucket, and gently stir for 1 minute. That’s all there is to it. As with all steps, again, gentle is the goal, as we don’t want to needlessly expose the beer to any more oxygen than will happen naturally during this process. Once the solution is stirred in, you’re ready to get everything connected, and your bottles filled. Put the sanitized lid back on the bucket, and put the bucket at a higher elevation than where you will be filling the bottles. I typically put the bottling bucket on the my kitchen counter top, and my bottles on a short side table where I can sit and fill them 1-by-1. Connect the tubing to the end of the spigot on your bucket, and connect the other end to the bottle filler (bottle fillers can be a bit finicky, so I always make sure I have 1 or 2 more laying around and sanitized just in case 1 doesn’t work well, or allows beer to flow after the spring has been closed between fillings). Simply place the end of the bottle filler wand into the bottom of a bottle, and it will begin to fill with beer. Stop filling once there is ca. 1 inch of space remaining to the top of the bottle. Place a cap on the top of the bottle, and use the bottle capper to crimp the top onto the bottle, and you’ve got your beer bottled. Repeat this process for each bottle until everything is bottled up, and you have successfully completed bottling day.

After your beer is bottled, is a final waiting period for your beer before it’s ready to drink. As with the fermentation stages, the amount of time you’ll want to wait largely depends on the style of beer you brewed. You will want to move the bottles to a dark room away from light and heat (just as with all stages of the brewing process), and allow a minimum of 2 weeks of bottle conditioning before drinking. Bottle conditioning is just the term used for the bottled beer to become carbonated by the added priming sugars. At the 2 week point after bottling, crack one open and try your very first home-brewed beer. If the beer isn’t carbonated enough for your liking, give it another week and try again. You can repeat that process as many times as needed. For most beers that would be brewed from a ready-made kit, the beer should be ready to drink within 2 -3 weeks max. If you made your own recipe and went with a much higher ABV beer, this will most likely take longer.

If you made it to this stage, you now have successfully brewed your very first batch of beer using the malt extract brewing method. If you’re like me, you not only learned a lot, but feel a tremendous amount of satisfaction in having brewed your very own beer. Not only can you brew exactly what you want to drink, but it is much cheaper to brew your own quality beer than it is to buy it all the time (up-front equipment/supplies costs aside). Now you can take what you learned on your first batch and apply it to your second batch and beyond. Don’t be afraid to come up with your own ideas and tweaks to recipes and interesting flavor additions. Being in charge of what you brew is half of the fun of the process. I also enjoy revisiting old recipes and brewing them again to see what I think over time, and slowly adjusting and tweaking until it’s exactly what I want in a beer. Wherever you go from here, I hope you enjoyed brewing your first batch. It just takes a little bit of patience, and a little bit of time, but the end result is not only gaining a life skill, but getting to brew and drink exactly what you want. Cheers!

So You Want To Brew Your Own Beer – Step 4: Secondary Fermentation

Now that brew day is complete, and your wort has been fermenting, and has turned into beer. You’ve been watching your airlock, and it has slowed down to a very intermittent and less vigorous bubbling. Once the airlock has finished bubbling completely, wait 24 more hours, and at this point, you are now ready to transfer your beer to your carboy for the secondary fermentation stage. This is the fastest and simplest phase of the brewing process, so you don’t need to set aside much time to get this done. The process for transferring the beer for secondary fermentation is largely identical to transferring the wort into the primary fermenter, but there are a few key points to note. As with all steps of the beer making process, we start by ensuring that all of our equipment is thoroughly sanitized, so once again, you want to gather your equipment and go through the same process that was used on brew day. The equipment needed is not as vast for the transfer, so this process of sanitizing will take less time than it did on brew day. Most people use a carboy for their secondary fermentation stage, and this is the norm that comes with most homebrew equipment kits. We’ll assume you’re using a carboy for your secondary, and as such, the items you will need to sterilize/sanitize for this process are as follows: carboy, auto-siphon, tubing, carboy stopper/bung, airlock, and hydrometer.

You may be wondering why you would go through the trouble of moving the beer from one container to another, and why you can’t just leave it to complete the fermentation in the primary fermenter. The short answer is that you can do that, but there are multiple benefits to transferring the beer to a separate container to finish the fermentation and 2 week rest period (higher ABV beers benefit from a longer rest period in secondary). What is actually happening during the transfer is that you are moving the beer off of the settled sediment (bits of grain, hops, and dead yeast/the yeast cake) which can produce undesired or off flavors in your beer. The secondary fermentation also allows more time for your beer to continue letting fine particulates settle to the bottom of the carboy, which will in-turn present a cleaner, clearer finished beer. Secondary fermentation is not required, but it does enhance the final finished product. Most brew-in-a-box kits will recommend this, and while it isn’t technically necessary (especially for a lower-gravity, lower-ABV beer), it is a process that is worth the relatively minimal effort involved to accomplish. Utilizing the secondary fermentation phase is also good practice for when you do eventually brew a higher gravity beer that will greatly benefit from the practice.

Before you start the transfer, take a gravity reading of the beer to have an idea of where your beer is currently sitting. If it deviates greatly from your target, this is the time to make corrections before you transfer to your secondary. This process is the same as the gravity reading we took of the wort before transferring to the primary fermenter. Again, I recommend writing this down somewhere in your beer log so you don’t lose it. At this stage, you can calculate the ABV of your beer with a simple formula. The formula is (OG – FG) X 131.25. That is the original gravity (the first reading you took from your wort before the fermentation started) – (minus) the final gravity (the reading you just took of your beer) X (multiplied by) 131.25. The resulting number is the ABV of your beer. This can continue to fluctuate during the secondary fermentation, so you’ll want to make sure to write down your gravity readings somewhere you can easily reference. If you find your ABV is below your target, you can add additional sugars to your beer before you transfer to the secondary, but as with all things related to that beer, you need to make sure to sanitize anything that will touch any aspect of your beer, so make sure to sanitize the pot you use to mix the water & sugars. If you need to add sugars, you’ll want to dissolve them in clean (bottled) water, and add that solution to your beer. You can use additional malt extract (if you bought extra beyond what was needed for your beer recipe), or any sugar source (white granulated sugar, brown sugar, candy sugar, honey, corn syrup, etc). Just as with malts, the sugar source will have a flavor and color impact on your beer. Darker sugars and malt extracts will produce both more color and flavor than using granulated table sugar, and are more suited to darker beers and vice-versa. 1 cup of most sugar sources dissolved into your clean water solution will add 1% ABV (on average) to the beer for a 5 gallon batch.

Once your equipment is sanitized, and you’ve made any sugar additions (if you’re using a pre-made kit, this shouldn’t be necessary) you’re ready to start the transfer. I recommend a height separation between your primary fermenter and the empty secondary. If you have a carboy harness, now is the time to fasten your carboy into it, as it makes moving around a heavy beer-laden carboy much simpler. Put the primary above the secondary (on a table, sturdy chair, etc.) and your secondary on the floor (if it’s a glass carboy, place a towel on the floor before you set the carboy down). If the primary is above the secondary, it will help the flow of the beer between the containers – gravity is your friend. Just as with the wort transfer, you’ll connect your tubing to your auto-siphon, and will put the auto-siphon into the beer in your primary fermenter, and the end of the tube into the carboy (or whatever your secondary vessel may be). One important note is that oxygen is not a friend to your beer, so you want to avoid splashing the beer during the transfer, so make sure to get your tube in your carboy down into the vessel as close to the bottom as you can. Additionally, just as with the wort transfer, there will be trub (grain, hop, and yeast particulates) that settles on the bottom of the primary fermenter, so don’t put the auto-siphon all the way to the bottom of your fermenter. Just as with the wort transfer process, you’ll be able to see the trub line as it gets closer to the bottom, and again, I recommend stopping before you get to that line so as to avoid transferring any unwanted sediment.

Once the beer is transferred to the carboy, you’re ready for the secondary fermentation phase, but it is at this stage, before we put in the stopper and airlock, that we will add any desired additional flavor/aroma ingredients. If you’re dry-hopping an IPA, adding additional hops to the beer in the carboy at this stage will draw out aroma characteristics (and some flavor as well) but won’t extract additional bitterness into the beer. If you’re making a flavored stout with vanilla or cinnamon, or whatever ingredients you choose, this is also where you would add those ingredients. The only real limit is your imagination, so feel free to experiment. If you’re using a ready-made kit, they would have everything you need included, and most won’t be adding ingredients at this point. Most ingredients will float on the top of the beer, and you don’t need to worry about them being soaked or stirred in at this stage. Indeed you want to avoid any undue agitation, as agitation creates exposure to oxygen, which we want to avoid. Once all of your ingredients are added, put the stopper in the carboy, and the airlock in the stopper (filled with clean, bottled water yet again). It is advisable to fill the airlock with water before you put it in the stopper, as if you overfill, you don’t want that water to drip into your beer. A tip for the stopper is to make sure that the neck of the carboy as well as the stopper itself are dry, as the stopper is smaller than the carboy neck opening, and if it’s wet, it will often want to try to back out of the hole. As with the primary fermentation, you want to move your carboy to a cool, dark place to rest. The secondary takes a bit longer than primary fermentation, and it is advised to let it sit for 2 weeks (minimum). That’s all there is to it. Once more, we’re just waiting on time to take its course, so sit back, grab a beer from the fridge, and pat yourself on the back for a job well done.

So You Want to Brew Your Own Beer – Step 3: Brew Day

Now that we have secured our equipment, and we have our ingredients, we’re going to focus on the best part – brew day! There’s nothing quite as exciting as brewing your first batch of beer, and it can seem a little intimidating, but if you read all of the instructions in advance and follow them throughout the process, you will be able to brew that first delicious batch of beer. Honestly, brewing the beer is the easy part. The hard part is waiting on the beer to finish primary and secondary fermentation so that you can get it bottled (which also has another wait period) and enjoy the fruit of your labor.

Before you get started with the business of brewing your beer, the step 1 is to take stock of all of the equipment that you need, and to get it sanitized. The brew day equipment list you have may vary slightly depending upon your kit/set-up, but the basics that everybody will be using that are needed on brew day are as follows: brew kettle (pot), brew spoon, primary fermenter (including the lid), airlock, auto-siphon, tubing, hydrometer, & thermometer. Make sure you read the instructions for your sanitizer thoroughly, and take your time with the process. Bacteria is the enemy of delicious beer, and you don’t want to go through all of the time and effort, only to have skunked beer at the end. The last advice I will give pertaining to sanitizing is quite important, as most beginner brew kits will have a plastic primary fermentation bucket. Do NOT use a scouring side of a sponge, or any other abrasive tool for cleaning/sanitizing the plastic fermenting bucket. It can scratch the surface of the bucket, and scratches are easy places for bacteria to hide. Also, make sure to use a fresh, clean sponge – don’t use the one in your kitchen that you use to clean countertops; it needs to be clean. Not only do you need a new sponge, but make sure to sanitize the sponge as well. As you use equipment during the process, make sure to put it back in your sanitizing bucket, as you will need several tools during multiple steps, and you want to make sure it remains sanitized.

Your equipment is sanitized, and you’re ready to get started with the actual business of brewing your beer, so make sure to get all of your ingredients in order. If you are using a pre-made brew kit, simply follow the instructions they provided for your specific beer. If you elected to buy your own ingredients, we can follow a similar path and achieve the same result. There will always be slight variances in the exact steps, methods, and measurements for each beer recipe, but we’ll cover the general procedure. I am again assuming that you are following an extract-based brew day, and NOT all-grain (we’ll cover all-grain in a separate blog post).

Step 2 is to steep your grains. Start by filling your brew kettle with 2.5 – 3 gallons of water (remember this is bottled, not tap), and bring the water to 150-165 degrees F – Note: if you’re using a large brew kettle with a built-in thermometer, and the water line doesn’t go at least 1 to 1.5 inches above the thermometer line, you can add additional water so that it covers it). Once the water has heated to the correct temperature range, add your crushed grains to the muslin bag, and tie a knot in the top of the bag. Steep the grains for ca. 20 minutes (while maintaining 150-165 F), then remove the grain bag from the pot/kettle. As you lift the bag out of the water, let the excess liquid drip out of the bag, but don’t squeeze the bag, you don’t need to get it all in the pot. You can now throw away the grains and grain bag. Your water is water no more, and is now wort.

Step 3 is the boil phase, and you need to bring the wort to a gentle, rolling boil. Add the liquid malt extract (LME) & dry malt extract (DME) to the kettle, and stir continuously as the water returns to a gentle rolling boil. It’s important to stir constantly, as you don’t want to malt extract to settle on the bottom of your kettle and burn. I also recommend having the LME already warmed up to make it easier to pour into the pot. About 10 minutes into step 1 where you steep the grains, run the LME container under hot tap water so that it warms up. LME is very thick and viscous, and you want to make the job of getting it into the kettle as easy as possible. I also like to take my sanitized brew spoon to get as much of the remaining LME out of the container and into the boil as possible. It will stick to the sides, and you want to get that into the kettle – the LME & DME is where the majority of your fermentable sugars come from.

Step 4 is where you add your hops to the boil. If you’re using a brew-in-a-bag kit, they will have included all of the hops that you need for this, as well as the timing of when to add the hops, which varieties, and how much of each. If you have a kit with clear instructions, simply follow what they say. If you’re going rogue and decided to do your own recipe, or don’t have a ready made kit with instructions, you can follow some general rules. For a no brew-kit IPA, or hop-centric beer, I’d add the hops in 3 phases – roughly 1/2 of them in first phase, 1/4 in second phase, and 1/4 in the third phase. As this is the boil phase, this is where the bittering effect of your beer will take place during the alpha acid extraction and conversion process under the heat of the boil. If you’re brewing a stout, or some other less bitter beer, I’d add the hops in 2 phases and boil out for a shorter amount of time. After each addition of hops to the wort, you will continue to let the beer sit at a gentle, rolling boil. The general target for the boiling phase is 1 hour, and the longer the hops are in the boil, the higher the alpha extraction. So, if you’re brewing a less bitter beer style and not using a kit, I would wait 30 minutes (halfway through the entire boil phase) before adding any hops, then boil 15 minutes after phase 1 hops added, add phase 2 hops and boil for the final 15 minutes.

Step 5 is a critical step, and it’s where we’re going to make use of the ice, as we now have to remove the brew kettle from heat, and get it cooled down as quickly as possible. Fill a sink, tub, whatever you have that is large enough to hold your brew kettle with cold water, and fill that with ice. Put the brew kettle into the ice bath. As the kettle is hot, the ice will melt quickly, so you will need to be monitoring the kettle and adding more ice as needed. The idea is to get the wort cooled down as quickly as possible, as bacteria growth occurs more easily at warmer temperatures. Once the temperature of the kettle has cooled down to 70 degrees F, we’re ready to move on to the next phase. Before moving on, a couple tips are to have the lid to your kettle (if it came with one) sanitized so that you can keep a lid on the kettle as it cools (this prevents anything from dripping/falling into your fresh wort). If you’re not using a kettle with a built-in thermometer, you’ll need to be vigilant in checking the temperature of your wort during the cooling phase. I’d check at least every 5 – 10 minutes.

Step 6 is where we transfer the wort from the brew kettle to the primary fermenter. Before you start, if you’re using a primary fermentation bucket with a spigot, be absolutely certain that the spigot is closed before you start the transfer. You don’t want to have your wort start pouring all over the floor, and lose the batch you just worked so hard to brew. Take your sanitized auto-siphon, and connect your tubing to it. Place the end of the tubing into your primary fermenter, and place the auto-siphon into the brew kettle. Don’t put the siphon all the way down to the bottom of the kettle, as we don’t want to get the trub (sediment on the bottom of the kettle) into the primary fermenter. As the wort volume drops during the transfer, it will become easy to see the bottom of the kettle and where the trub line is. I always stop the siphoning just above the trub line so as to avoid getting any large bits of sediment. There will always be some sediment that will transfer, but it will settle out during other phases of the beer making process, so don’t worry.

Step 7 is where we add water back to the wort to get it up to the level needed for our batch size (most brew kits assume a 5 gallon batch, but double-check what yours is before adding water back in). Again, this is bottled water, NOT tap water. Add the water to the wort to reach the correct volume for your batch, and make sure that the water is room temperature, or roughly in the 65-70 degree F range. If it’s slightly above or below, don’t sweat it, but it should be close to that temperature range. After the water is added, stir the wort thoroughly. Now we want to take a gravity reading of the wort so that we can calculate the ABV at the end of the fermentation process. Place your sanitized hydrometer in the wort, allow it to settle, and read the number at the wort line. That number is the original gravity (OG) reading. Make sure to keep the OG somewhere safe as a reference. I honestly recommend keeping a brew journal, or at least writing down your recipes and steps, etc. It’s great for trial and error, and let’s you tweak recipes in future. If you write it in a journal, your OG as well as FG (final gravity) and ABV will be right with that specific recipe for future use.

Step 8 is the final step of the brew day, and it’s where all of the real magic happens. We’re now going to pitch our yeast into our wort. Pitching yeast just means to toss the yeast into the wort. If you have a brew-kit, follow the instructions for your specific yeast. If it says open satchel and pitch, do exactly that. If your kit says to rehydrate the yeast first by adding to water then pitching (less common in brew kits), then do that. After the yeast is pitched, we’re going to stir again with our sanitized spoon. Now we put the lid on the fermenter, securely locking it into place, and prep the airlock. You will need to fill the airlock halfway with water (bottled water again, even for the airlock), and gently twist the airlock down into the bung in the lid. Carefully move the fermenter to where you will store it during the primary fermentation (this typically takes around 1 week for primary fermentation to conclude, but could take more or less time depending upon your specific beer and climate). The fermenter should be stored out of direct sunlight, and away from heat sources. Ideally, placing the fermenter in a dark place like a closet works best, but anywhere that the temperature is in the 65-70 degree F range (just like the water we added back to the wort in step 7).

Congratulations! You have now successfully made it through your first brew day. You will notice that typically within 24-48 hours, your airlock will be bubbling. This is your visual clue that fermentation is happening, and the yeast is doing its job and converting the sugary wort into beer. In the next blog we’ll be going over the process of the secondary fermentation, and will be 1 step closer to actually getting the beer into the bottles. For now, sit back and endure the hardest part, waiting on nature to run its course.

So You Want To Brew Your Own Beer: Step 2 – The Ingredients

Now that you know what equipment you need in order to brew great beer at home, we’ll be taking a look at what ingredients are required. At its most basic, beer is comprised of 4 ingredients; water, malted barley, hops, & yeast. As I am focusing on first-time homebrewers, and as I suggested in part 1 of this blog series, I HIGHLY recommend starting with an extract-based brew for your first attempt. It is far simpler, and much less costly for someone who is trying to brew their first batch of beer. We’ll be proceeding under the assumption that you are doing an extract brew, but we will talk about all-grain brewing in a later blog about homebrewing.

There are a few ways to go about getting the ingredients you need for your first batch, and the specific ingredients needed obviously vary based on the style of beer that you intend to brew, but the general ingredients and suggestions I’ll be making apply to all beer styles. The simplest, and most cost-effective means of brewing your first batch of beer is to get a pre-made homebrew kit for the specific style that you want to brew. As with the homebrewing equipment itself, you can readily, and easily find beer recipe kits online for most styles you may want to try to brew. I recommend going this route for your first time, as it’s super simple, but if you want to piece together the ingredients yourself, we will cover them all, so you can certainly choose that path as well. As for ready-to-go beer recipe kits, you can get them on Amazon, or on any number of other homebrewing websites. You can usually get kits from the same store that has the equipment you bought. Several easy-to-find brands are Mr. Beer, Brewers Best, & Northern Brewers. The recipe kits are often referred to as brew-in-a-box kits, as they come in a box, and have all of the ingredients you need to make that specific style. All 3 of those brands sell kits on Amazon, and you can also go to their websites, or to a homebrew supply website as well. If you live in a larger metro area, chances are likely that you have at least 1 local homebrew supply shop, and the vast majority of those sell beer recipe kits.

For an extract-based brew day, you will need both liquid and dry malt extract. The specific malts used are based on the beer style you’re brewing. Pre-made kits have these selected for you so that your first batch tastes and smells as the style should. The malt extract is the primary source of color, malt flavor, and sugars in your beer. Each beer style has different types of malt required, so each kit will contain different volumes and types of both LME (liquid malt extract) & DME (dry malt extract). One pro-tip for the LME is to run it under hot water for 5 -10 minutes before you need to add it to the water during the brew phase, as it is very viscous, and it pours much more easily when heated up. Don’t microwave it or anything like that, just run the container itself under hot water, or fill a bucket with hot water and put the container in it. By hot water, I mean tap hot, not boiling. In addition to LME & DME, most ready-made beer kits will also have some dry grains of some sort and a muslin bag (kind of a cheesecloth like material). Most recipe kits will have you start by steeping the grains in the muslin bag first before any of the LME & DME is added to the recipe. If your kit doesn’t have any dry grains and a muslin bag, don’t worry, they don’t all have them, but it is more common than not.

The next major ingredient you’ll need/have in your kit are your hops. Make sure to read the instructions before starting the brewing process, as you want to have a clear understanding of the order of operations before you begin. This is particularly important when speaking of hops, as depending upon the beer style, all hops may be added to the boil at the same time, or they could be staged at various points of the boil. The staging is done to control the temperature and volume of hops added for alpha acid extraction (primarily) into the beer. Depending on your beer style, you may also have additional hops that are supposed to be added during the secondary fermentation phase, or for dry hopping. Dry hopping is a bit of a misnomer, as the hops are very much wet, they just are added after the beer has been brewed and fermented with yeast. Dry hopping is done during the secondary fermentation phase, after the beer is transferred from the primary fermenter (bucket, carboy, etc.) and into the secondary vessel. After the beer is transferred, the additional hops are added into that beer while it ferments and clarifies during the secondary phase. This phase doesn’t draw additional alpha acids into the beer, but adds additional layers of hop flavor, and aroma. Dry hopping is most often seen in IPAs as a way to impart additional aromas onto the beer.

The third ingredient involved in making your beer is arguably the most important, as without it, beer wouldn’t be beer, it would just be wort. We are referring to yeast of course, and specifically, ale yeast. How do I know that your first beer is an ale and not a lager? Ale is the oldest type of beer, and by a vast margin the simplest to brew, and the cheapest to brew. Lagers require expensive, more specialist equipment to brew, and are really not beginner-friendly, so most beer-in-a-box kits will be for some form of an ale style beer. Ale yeast has a much larger range of temperatures at which it functions and ferments your wort into beer, and as such, it is much more suitable to the vast majority of climates in the average home. The main key is to not leave your fermenter near a heat source. As hardy as ale yeast is, it still needs to be kept out of direct sunlight, away from warm appliances, etc. I recommend putting your fermenter in a dark closet away from light and heat sources. Ale yeast can impart a very large range of flavors into your beer, including complex esters and phenols that can produce a range of fruity characteristics in the beer’s flavor profile. Your specific beer kit may prompt you to pitch the dry yeast right on top of your beer to start fermenting, or it may have you dissolve the yeast in water, and pitch that yeast solution into your beer. Both methods achieve the same goal, and you should follow whatever instructions your kit calls for.

Lastly, we arrive at the final ingredient, and that which makes up the bulk of your beer recipe; water. The importance of water is often overlooked by a homebrewer, particularly those brewing their first batch at home. The type of water used can have a dramatic impact on the final product, and as such, I recommend steering clear of tap water. Using a high quality spring water or drinking water (bottled water) is the best practice for homebrewing. You will want to ensure that you have more than enough required for your batch of beer. If you’re brewing a standard 5 gallon batch, I’d make sure to have at least 7 gallons on-hand for brew day, as the volume will decrease during the boil due to evaporation, and you will be adding water back to the wort before you pitch your yeast. In addition to liquid water for the actual beer recipe, you’re also going to need ice, and a lot of it. If you have an ice-maker in your fridge, that’s great, but don’t expect that to be anywhere near enough for the brewing process. On my brew days (for 5 gallon batches) I completely use all of my ice maker’s ice as well as at minimum 4-6 additional bags of ice. Ice is needed to quickly cool the beer down to the needed temperature after the boil, and before you pitch the yeast. You can thrown your brew kettle into a bathtub filled with cold water and ice, or into your sink, whatever works for you, but it needs to be ice-cold to quickly drop the temperature. Warm temperatures are a bacteria breeding ground, and you don’t want skunky beer, so the quicker this is done, the better.

That is the basic ingredients needed for an extract-based brew day. If you buy a beer-in-a-box kit, it will come with everything you need except for water and ice. An important ingredient note is that if you don’t get a brew-in-a-box kit, you will also need priming sugar (this is for bottling your beer). Check that your kit comes with priming sugar, and if you buy ingredients piecemeal, be sure to add priming sugar to your ingredients list. In the next homebrewing blog we’ll be talking about the actual process of brewing your beer from step-to-step, and we’ll also give you some pointers and things learned from trial and error after many successful batches brewed. Until then, grab a beer from the fridge, and start planning what you want to brew on brew day. Cheers!

So You Want To Brew Your Own Beer – Step 1: The Basic Equipment

You’ve explored the vast array of beer styles from light, crisp lagers, to black-as-death imperial stouts, and everything in-between. You can blindly identify a kettle sour from a gose, and a Märzen from a Helles. You’ve visited all of your local craft brewers on many occasions, and your favorite craft beer bar knows your order as soon as you walk in the door. You more than dabble in the world of craft beer, and exciting as it is, you thirst for more. The question is, where do you go from here? Perhaps it’s time you roll up your sleeves and give brewing your own craft beer a whirl. Homebrewing beer is as old as beer itself, and for thousands of years, is the primary means by which most beer was brewed. Beer brewing is as much art as it is science, and it can seem intimidating at first, but if you know what to do, have the equipment that you need, and can follow directions, you too can brew amazing beer in your own kitchen.

As you embark on your homebrewing journey, there are several things to think about before you brew your first batch. The first thing to consider is whether or not you’re going to brew from extract, or make an all-grain brew. A decade or 2 ago, extracts for homebrewing were available, but the quality of the products was inconsistent at best. Fast-forward to today, and not only are extracts extremely consistent, but they are affordable, and make the entry-point to homebrewing as easy as following a recipe for dinner. Extract brewing also has the added bonus of requiring much less time, money, and equipment compared to all-grain brewing, and is the process I HIGHLY recommend anybody uses for at least their first few batches that they brew. Believe me, once you brew your first batch from extract, you’re not going to care that you didn’t do a small-scale version of what the big brewers do.

Before you select which style of beer you want to brew, and before you even consider what ingredient to get for your first brew day, you need to get the requisite equipment for brewing. There are several way to go about this, as just like extracts have come a long way in the past few decades, so too has the homebrewing equipment space changed rapidly. You can get individual items that you need in order to brew, or you can buy a purpose-built, all-in-one homebrewing solution. The all-in-one systems do typically contain more than 1 item in their brewing system, and you will need all of the various parts of the system in order for them to work together properly. While they do work very well, they are also very costly, so I recommend going the old-fashioned route, and buying the basic tools you need in order to brew on your stovetop. The basic tools are as follows: brew kettle, brew spoon, carboy (I recommend getting 2 carboys – we’ll expand on this later), fermentation bucket, auto-siphon, silicon tubing, thermometer, hydrometer, bung(s), airlock(s), bottle filler, bottle capper, bottle caps, sanitizer, scale, empty bottles, bottle cleaning brush, and bottle drying rack. This is not an exhaustive list, as there are a lot of items on the market that you can get to make things easier for you, but these are the basic tools of the trade. You can find all of these items online from multiple different brewing supply stores (I recommend checking out Midwest Supplies – and no, I’m not sponsored, they just have really great starter kits for a fair price), and most of them have homebrew starter kit package deals that include everything you need to succeed on brew day for a reasonable price. As all suppliers and kits vary, you’ll want to double-check that your kit comes with all of the basic essentials that I listed. I’ll also make note of some other things you may want to consider, but that aren’t necessary.

Assuming that the brewing equipment list didn’t scare you off – and there’s no need to be scared, you can absolutely brew great beer on your first attempt – we’re going to expand on some of the specific items in the equipment list. Most homebrewing kits will come with anywhere from a 6 – 4 gallon carboy (or carboys depending upon the kit), as the average homebrew batch size is a 5 gallon batch. I like a 6 gallon carboy or fermenting bucket with spigot for the primary fermentation stage, as having the extra room makes everything a lot neater. I also wouldn’t recommend any smaller than a 5 gallon carboy even for the secondary fermentation vessel. 4 gallons can just be too small volumetrically, even if there is evaporation during the boil. Another nice item (or 2 if you have 2 carboys) to make your life simpler is a carboy harness. You don’t want to drop your carboy full of beer, and they’re heavy, so having a harness for your carboy makes that process that much simpler and safer. As for brew kettles, you can get a fancy, purpose-built brew kettle that has a built-in thermometer and ball valve, or as simple as a tall stock pot. No matter which option you choose, I recommend getting at least a 7 gallon capacity vessel if you intend to brew standard homebrewing 5 gallon batches. Yet again, it keeps things much tidier having that extra space with which to work. If you opt for (or your kit comes with) a fermenting bucket for your primary fermentation, make sure that it has a spigot built-in. The silicon tubing is used in many of the steps in transferring from vessel-to-vessel. It’s cheap, and used often, so I would get plenty of extra hosing just to make your life simple. Depending upon your set-up, the length of hosing can vary, but it can’t really be too long, so I’d aim for 6 foot sections on the extra tubing you buy. Most homebrew kits come with 3/8 inch spigot, so make sure your tubing is sized to fit and make a nice, tight seal. Finally, for sanitizer, there are plenty of options out there, and it’s all preferential, but 1 Step is an easy-to-use product that will sanitize all of your equipment in 1 step. Simply add the sanitizer to a cleaning bucket of water, mix, and soak each item in the solution for 10-15 minutes.

This is not an all-inclusive list of all homebrewing equipment out there, but rather the basics that you will need to actually make your first batch of beer in your home. As you progress in your homebrew journey, you’ll most likely start to figure out what you really like about what you have and what you’d like to change, and there are a ton of options out there for additional equipment, and equally as many equipment upgrades. In the next homebrewing blog we’ll focus on the ingredient side of things, and from there, you’ll be ready to brew your first batch of beer. Homebrewing is a journey, a learning experience, and a very rewarding endeavor. There’s nothing quite like getting to enjoy the fruit of your labor, and what better way to do so than by brewing the beer that you want to drink. Cheers!

Beer 101 – Beer Basics: What Is Beer?

In this ongoing blog series we’ll be exploring beer from A to Z, and hopefully demystify the wonderful, varied world of beer. If you enjoy beer and have always wondered how it’s made, what’s in it, how does it get from grain-to-glass, or any other facet of beer making and its constituent parts, then this series is for you. If you always wanted to try your hand at homebrewing, but didn’t know where to start, this Beer 101 series will give you the information you need to understand how it all works, and how to get from that desire to your first homebrewed beer. Grab a seat, take notes if you like, and enjoy as we dive into the basics of beer.

It’s impossible to breakdown a subject as vast, and with as many parts as beer without starting at the very beginning. So, what exactly is beer? Simply put, beer is an alcoholic beverage made of water, malted barley (or other grains), yeast, and hops. In-fact, the oldest continuously existing law in the world is the Deutsches Reinheitsgebot (German Beer Purity Law), which was enacted in 1516, and dictates that beer can ONLY contain those 4 ingredients, and nothing else. The law even goes so far as to specify that the grain used is barley. We’ll go over the history of that law in another blog, as it’s quite a lengthy study and interesting bit of history. If you’ve ever wondered why German brewers don’t add other things to their beers (like lactose, or chocolate) as brewers from everywhere else do, particularly in the world of craft beer, it’s because of the Beer Purity Law. Under German law, by definition, the beverage would no longer be considered beer. Beer is separated broadly into 2 types; ales and lagers – both of which have many styles and sub-categories of styles. Ales are made with top-fermenting yeast (typically fermented at warmer temperatures), and lagers with bottom-fermenting yeast (typically fermented at colder temperatures).

To better understand beer, let’s examine each part one-by-one. We’ll skip water, as it’s safe to assume that we all know what water is. Grains are the 2nd largest portion of any beer, and most typically that specific grain is barley (and in Germany’s case it MUST be barley). Barley (Horgeum vulgare) is a grass which grows primarily in temperate climates, and is one of the oldest cultivated grains in the world. It is used for beer brewing, eaten as a food source, and used in the production of other alcoholic beverages as well. Barley comes in a number of varieties, but those most commonly used in beer production are 2 & 6-row variants. Row in this sense is referring to the growth pattern of the kernels on the plant. 2-row is most commonly used in beer production due to its large kernel size, as it takes less processing versus using plants with smaller kernels. There is also a slight difference in the starch and protein contents of 2 & 6-row barley. 2-row typically has a slightly lower protein content, but a higher starch content, and generally produces a more malty flavor (6-row produces a more grainy flavor).

Now that we know what barley is, what does malted barley mean? Malting is the process by which which barley grain (or kernels) is germinated (soaked with water and allowed to grow), and subsequently has the germination process stopped by drying the germinated grain with hot air. The primary purpose of malting the barley is that is produces enzymes that are needed to convert the starches in the grain into fermentable sugars during the mash phase of the brewing process. We’ll go over what mashing is, as well as the other beer making steps in another blog. Effectively, without malting the barley, it is not very useful as a grain for the purposes of beer making. The enzymes are key to the process, and they also change the flavor profile of the grain.

Hops (Humulus lupulus) are the cone-shaped strobiles (flowers) of the hop plant, which is a perennial vine. Hops are used in beer making for aroma, flavor, and stability of the finished beer. Hops have many notable aromas and flavors depending upon the specific hop variety, but are most known for their bittering effect in beer. Depending upon the specific variety of hop used in beer production, the aromas and flavors produced can vary drastically, as can the overall bitterness of the final product. Which specific hop variety is used, as well as how much, when, at what temperature, and at what stage of the process they are added all have an effect on the aroma, flavor, and bittering produced by the hops in the final beer. The bitter characteristic of hops is due to alpha acids in the hops that become isomerized (turn into iso-alpha acids) when the hops are heated during the brewing process. The ultimate determination as to how bitter a hop makes the beer is how much of the alpha acid in the hops is isomerized while brewing, most notably during the boil phase of the brewing process. Specific hop varieties have as much variance in alpha acid content as they do in aroma and flavor profile, so choosing the right hop or combination of hops to compliment a given beer style is paramount.

Finally we turn to the unsung hero of the brewing process, and without which, beer wouldn’t be beer – yeast. Yeast is a single-celled organism in the Fungi kingdom. Yeast comes in many different forms and varieties, but generally speaking, there are 2 main types of yeast used in the beer making process; ale yeast and lager yeast. Ale yeast (Saccharomyces cerevisiae) is a top-fermenting yeast that functions best at warmer temperatures (typically in the 60-70 degrees F range). Lager yeast (Saccharomyces carlsbergensis) is a bottom-fermenting yeast that functions best at colder temperatures (typically in the 45 – 55 degrees F range). The temperature can vary for both ale and lager yeast depending upon the specific strain used. Much as there are different varieties of hops, so too are there different strains of yeast. The differentiation between top and bottom fermenting refers to the activity of the yeast itself on the wort (the liquid produced in the beer brewing process before the addition of yeast, and conversion of sugars to alcohol). Ale yeast gathers at the top of the fermenting wort, and lager yeast gathers at the bottom of the wort, hence top/bottom-fermenting. As with hops, the specific strain of ale or lager yeast used in the brewing process can have drastic impacts on the final aroma and flavor of the finished beer. Temperature control during all stages of fermentation are also critical in controlling specific aroma and flavor profiles.

Now that we’ve peeked our heads down the rabbit hole, you should have a better understanding of what beer is and its composition. While quite simple in its formulation, beer production is a rather complicated process that involves a lot of moving parts, and a lot of time and patience. As a homebrewer, I absolutely love getting to come up with my own beer recipe ideas and getting to enjoy the fruits of my labor. That process has given me a much greater respect than I already had for those in the brewing industry. As challenging as beer making is, and as frustrating as it can be at times, it is, if nothing else, a labor of love. Beer may just be comprised of 4 ingredients, but it is the byproduct of science, passion, and a lot of hard work. To all the brewers out there making our favorite drink, cheers to you!

The Top 10 Best Craft Brewers in Tampa, FL

As a craft beer lover located in Tampa, FL, I am blessed to be spoiled for choice when it come to craft beer options. Indeed, some of the top-rated craft brewers in the country call Tampa, FL home. Whether you’re a local who is looking to find a new local craft brewer, or a tourist who wants to drink where the locals drink, this list will give you 10 top options for drinking amazing craft beer in a very laid-back, Tampa atmosphere. For the purposes of this list, we’re including brewers who all call the greater Tampa Bay area home – we’re including Hillsborough Co. (the county in which Tampa is located) & Pinellas Co. (Tampa’s neighboring county to the West, with world-class beaches). While the greater Tampa Bay area metro includes additional counties which also have great craft beer options, the majority of the top craft brewers reside either in Hillsborough or Pinellas Co.

  1. Cigar City Brewing Co.

Located just W. of downtown Tampa,, and mere minutes from Tampa International Airport, Cigar City Brewing Co. is a Tampa institution, and arguably not only Tampa’s, but Florida’s most well-known craft brewer, and rightfully so. Cigar City Brewing Co. is frequently cited as one of the top 10 craft brewers in the country. With a range of beer styles to suit any palette, CCBC is most well-known for their Jai Alai IPA; a bitter-forward IPA with citrus and pine/resin notes sitting at 7.5% ABV. Equally famous, and one of the harder beers to acquire, even for a Tampa-native, is Hunahpu’s Imperial Stout. This limited-release seasonal beer is so popular that CCBC has a day (Hunahpu’s Day) dedicated to the beer’s release, and only those dedicated enough to get in line hours in advance will have a chance to grab this world-class beer. They have a strict 2 bottle per patron limit, so it’s best to get there early if you want to get your hands on this one. This stout a brewed with cinnamon, vanilla, cacao nibs, and chili peppers, and is my absolute favorite stout in the world.

2. Angry Chair Brewing Co.

Located between the Hillsborough River (to the West) and historic Seminole Heights neighborhood (to the East) is Angry Chair Brewing Co. While this brewer may not yet be famous across the country, to FL locals, this, like CCBC is a must-stop destination for quality craft beer. With a tap room that’s a mix of natural wood elements, and an industrial space, this brewer has the taproom ambience down to a science. AC is well-known as one of the FL stout masters, but they are constantly innovating, and brew all styles of beer. Indeed, in their tap room you will find a nice array or not only stouts, but IPAs, sour beers, porters, and even a gold medal winning pilsner. Among local craft fans, there is a long-running debate as to who is better – Angry Chair, or Cigar City. All I can say is that both brewers are absolute masters of the game, and there is not a bad choice among the two.

3. Tampa Bay Brewing Co.

Tampa Bay Brewing Co. is a family-owned and operated brewpub that was established in 1995 in the heart of the historic Ybor City district. They are located right in the middle of Centro Ybor, and are virtually impossible to miss as you’re passing through the main center square. Equally convenient is that they’re just minutes from downtown Tampa, Tampa International Airport, and are situated in one of Tampa’s most vibrant neighborhoods with shopping, clubs, and restaurants all around. What sets TBBC apart from many other local brewers is that they are a true brewpub. They brew multiple different styles of top-quality beer to suit any taste, as well as feature rotating seasonal offerings. TBBC is a one-stop shop if you’re in Ybor City and both thirsty for quality beer and hungry, as they have a full-service restaurant that has unbelievably good food. Personally, I recommend the Shepherd’s Pie that features a rich gravy made from their own stout. With plenty of table space, and a very large bar with a hand-hammered copper top, TBBC is a Tampa icon you won’t want to miss when you’re in town.

4. Coppertail Brewing Co.

Coppertail Brewing Co. is another Tampa craft brewer that is located in the Ybor City neighborhood. They’re not even 1 mile away from TBBC, and as such, are minutes from downtown Tampa, and Tampa International Airport. Inside Coppertail you will find a very large and open space that is industrial in its style. There are multiple large bars with plenty of stools, and they have multiple cozy corners where you can sit and chat with friends, or play games on their ample table tops. Coppertail is very well-known for their stout and IPAs, but as with all brewers on this list, they brew all different styles of beer to suit any taste. They’re also pet-friendly, so feel free bring your dog with you while you enjoy some top-notch craft beer.

5. Big Storm Brewing Co.

Big Storm Brewing Co. is located in Clearwater (in Pinellas Co.) just minutes from St. Pete/Clearwater International Airport. They recently opened a Pasco Co. location as well (N. of Hillsborough Co., and part of the greater Tampa metro area). Big Storm is another craft brewer that combines the option of food with their beer offerings, including Southern-style BBQ on the lunch menu. As with all craft brewers on this list, Big Storm brews a range of different beer styles to suit any taste, but is most well-known for their range of IPAs. From big, resinous, W. Coast style IPAs, to FL-inspired citrus IPAs, Big Storm is the perfect place for a thirsty hop head to grab a pint. They also feature a very large outdoor seating area that is pet-friendly, so you can bring your dog along as well.

6. Southern Brewing & Winemaking

Southern Brewing & Winemaking is an outlier on this list, but in the very best way possible. They’re located right in the heart of the historic Seminole Heights neighborhood in Tampa, and both brew their own fabulous beers (and wines) as well as serve as your one-stop shop for beer brewing supplies and ingredients (they also cater to wine as well). This is my personal homebrew supply store, and they have everything you need to make your brew day a success. Their friendly and knowledgeable staff will make sure you have everything you need to brew your own great beer at home. I like to sit at the bar and try some of their newest creations before I shop for my brewing supplies. In particular, their sour beers are legendary. While SB&W doesn’t have their own kitchen, they do have a large parking lot where food trucks stop by each day. They rotate daily, and post who is going to be there each day of the week, so if you have a favorite food truck, you’ll know when to drop by. They are also another spot that has an outdoor patio with ample seating that is pet-friendly. A pro tip for you – don’t forget to have them fill up a growler of your favorite beer to take home with you.

7. Cycle Brewing Co.

Cycle Brewing Co. is located in the heart of St. Pete. (in Pinellas Co.) on Central Ave. just W. of downtown, and only minutes from the St. Pete USF campus, world-famous Salvador Dali Museum, and some of the best restaurants in Tampa Bay. They brew an eclectic mix of beers and beer styles, from well-done examples of multiple styles, to flavored variants, but the most coveted by locals are their barrel-aged beers. You can find bourbon barrel-aged stouts as well as rarely-seen barrel-aged barleywines, and barrel-aged stouts and porters with multiple different flavoring additives. 1.5 blocks S. & 2.5 blocks E. is my absolute favorite burger restaurant, not just in Tampa, but anywhere in the U.S. As Cycle Brewing doesn’t have a food menu, I recommend stopping by The Avenue for some of the most inventive, indulgent burgers you will ever eat. Make sure to get a double order of their cajun fries. I have still not had better to this day. Whether you eat before you visit Cycle Brewing to drink or vice-versa, if you’re in the neighborhood, you’re guaranteed a good time.

8. BarrieHaus Beer Co.

BarrieHaus Beer Co. is another very unique brewer on this list, as they focus their brewing on lagers, and specifically, German-style lagers. They do have some other beers styles available (notable an IPA, though it is brewed with lager yeast), but their primary focus is on their lager game. Aside from their versions of traditional German lagers, they also are one of the few places that has a radler on-tap. For those who don’t know, a radler is a hybrid beer made of equal parts lager beer and lemonade (traditionally), and for my money, is one of the most thirst-quenching beer styles to enjoy on a hot Tampa day. Barriehaus is located on the W. side of the historic Ybor City neighborhood, and is conveniently not even 1 block from the Centro Ybor parking garage. Perhaps the most defining characteristic of BarrieHaus is that they feature a large, beautiful biergarten. The biergarten is pet-friendly, so Fido can come along while you enjoy your beer.

9. 3 Daughters Brewing Co.

3 Daughters Brewing Co. was founded in 2013 in St. Petersburg (Pinellas Co.) by a restauranteur who turned to making his own beer for a beer-battered fish recipe in his restaurant. After he was done tweaking, he decided to put that beer up on his tap, as he thought it was fairly good. As it turns out, everybody else agreed, and it was his best-selling beer on-tap by a vast margin. One thing led to another, and 3 Daughters was officially born. 3 Daughters is located just W. of downtown St. Pete, right of off I-275, and just minutes from Tropicana Field (home of the Tampa Bay Rays baseball team). 3 Daughters has a wide range of beer styles on-tap, but is most famous for it’s Blonde Ale & IPA offerings. They also have a barrel-aged strong ale, which is a very hard-to-find style on any tap, and one of my favorite beer styles. For those who like to eat while they enjoy their favorite craft beer, 3D does have a nice selection of food – including vegetarian options and a kid’s menu.

10. Mr. Dunderbak’s

Mr. Dunderbak’s, or my home away from home as I like to call it, is a another one of the most unique brewers on this list, and the most expansive, in terms of offerings, by far. I have been a regular at Mr. Dunderbak’s for nearly 2 decades now, and there’s a very good reason I love this place so much. Walk through the doors, and you’re greeted with a Bavarian village biergarten vibe, and have the option to sit at a communal table (beer hall style), grab an open stool at the large bar in the dining room, or grab an open stool at the smaller front bar (this is best for carrying on a conversation with others) or a table in the front room. Mr. Dunderbak’s is all about beer. They have a selection of greater than 50 beers on tap at all times, featuring mostly German beers, but they also have their own beers on tap as well. JB Ellis (the owner) & Jason (one of his long-time employees) brew both traditional style beers, as well as more unique offerings. In addition to the massive tap selection, they have several hundred beers you can get from their cooler, and several hundred more in their beer cellar room. One thing is certain, you will not want for options when dropping by Mr. Dunderbak’s. Speaking of options, make sure to go on an empty stomach, as they have a very large menu of German food that is out-of-this-world delicious. My personal favorite is the Von Bomb sandwich (an oversized fried schnitzel – veal or pork, your choice – that is doubled over, topped with 3 different kinds of cheese, fried eggs, bacon, spicy paprika sour cream sauce, onion rings, and their homemade kartoffelpuffern). It is legitimately one of the best sandwiches I’ve ever eaten. Mr. Dunderbak’s is located in New Tampa, just S. of Tampa Palms on Bruce B. Downs Blvd.

What’s So Special About Craft Beer?

With so many beer buying options in the marketplace, and prices varying wildly from one beer to the next, why would somebody pay a premium to drink the favorite beverage of hipsters the world over? While this may seem like a silly question to those of us who are absolute craft beer fans, to the uninitiated, it is indeed a fair and valid question. Why would someone choose to spend more money to buy beer from one company that charges a statistically significantly higher price for the same beverage? While it would be beyond simplistic to simply reply that it costs more because it’s a better product, it doesn’t really touch on nor elaborate on the extensive differences between the two products. How does one define better? It looks better? It tastes better? What exactly does better beer mean?

I like to explain the difference between craft beer and non-craft beer to those with no knowledge on the subject as analogous to the car industry. What is the difference between a Yugo and a Lexus? To most, this question would immediately conjure up images of a cheap, poorly-built, economy car vs. a well-built, high-end luxury car. This does a fairly decent job of explaining the fundamental chasm between big-box beer, and craft beer. Better beer, in the sense of craft, really means that the quality of ingredients are much higher, and thus significantly more expensive, it’s not made by a giant corporation with hundreds and hundreds of workers on the line, and there is a great deal of care and craftsmanship put into its production. In a broad sense, that is the underlying difference between big-box and craft beer, but it does goes much deeper than that.

Most likely think of big-box beer as the typical big corporations that have been brewing beer for hundreds of years, and produce remarkably similar pale, yellow lagers that are nearly indistinguishable from one brand to the next. At one point or another, most Americans (assuming they’re of legal drinking age naturally) have had a big-box beer. It’s always readily available at your local grocery store, gas station on the corner, and at your local sports stadium. Big-box beer is as American as apple pie. I will be the first to outright admit that not only have I had many big-box beers, I still buy them to this day, and willingly purchase them for my beer consumption pleasure. I am not a beer snob by any means, and I fervently believe that people should drink what they like, and not let anybody else’s opinion hold any sway over their decision. With that said, I typically buy big-box beer if I’m going to a BYOB event where others may just take my beer, and from a cost perspective, it makes sense not to bring the good stuff. My opinion is that big-box beer is cheap, but it’s still beer. Craft beer is more expensive, but it’s not just beer, it’s experiential.

Most craft brewers have very few people working for their company, certainly compared to big-box beer brands, and as such, are much lower-volume producers of beer. Indeed the current definition of craft beer in America is a brewer that produces fewer than 6 million barrels of beer per year, and less than 25% of the brewery is owned or controlled by a brewer that is not a craft brewer itself. This is a decent gauge as to what craft beer is about, but how many barrels do big-box producers brew by comparison? Most big-box brewers produce well in excess of 100 million barrels per year. It really is David against Goliath by comparison.

It’s not just overall volume of production of beer that sets craft and big-box beer apart. One of the most critical differences between craft and non-craft beer is the ingredients used in the beers’ production. Your average big-box beer is using water (of course), hops, yeast, and malt – which is the basic ingredients list of any beer – but they also add adjunct ingredients, and tend to use fewer of the ingredients that are both costly, and add to the depth of the beer, compared to the craft brewers. Non-craft brewers often use rice, corn, or other cheaper ingredients to fill their beer ingredients list. There’s nothing fundamentally wrong with this, as it produces effects on the final product that are in-line with their desired result; a clean, easy-drinking beer with very little aftertaste, and minimal weight. Craft brewers on the other hand will have water, hops, yeast, and malt as well, but for any adjunct ingredients, they are typically using more expensive additives to create a unique beer drinking experience (such as bourbon barrel-aging, or the addition of lactose and vanilla as flavoring agents). Another massive difference is the overall volume of each ingredient used. Hops are expensive, as is malt, and most styles of craft beer have quite a lot of both, whereas non-craft brewers don’t use too much of either.

In the most basic sense, craft beer is the modern day equivalent to traditionally-brewed, small-scale beer operations of the past. Non-craft beer is essentially the opposite, with completely different goals for the final product. Non-craft beer is largely similar between brands, regulated almost exclusively to the realm of lagers, and contains limited to no distinction in traits from one brand to the next. Craft beer is the polar opposite. It contains a mix of both lagers and ales, and the brewers are constantly evolving and creating new, exciting twists on any given style, and indeed, creating new ones. Non-craft beer is familiar. Craft beer is adventurous.

While I only touched on the surface of some of the key traits that set craft and non-craft beer apart, and indeed I could write pages, and pages about it, it brings us back to our original question. Why would someone choose to spend more money to buy beer from one company that charges a statistically significantly higher price for the same beverage? What exactly is so special about craft beer? Craft beer is special because it is craft beer. Craft beer is endlessly variable. There are hundreds of styles and sub-styles of craft beer from which to choose to suit any palette. Craft beer is inventive, interesting, exciting, and unabashedly delicious. Craft beer is a return to our hundreds of years old tradition of brewing beer, and in my opinion, it’s all the better for it. What’s so special about craft beer? It’s craft beer, and that says it all.